Cute and Creepy
- Makalla Shernick

- Mar 12, 2022
- 5 min read
Updated: Mar 15, 2022
In the introduction to this assignment, everyone bought toys from home without much context. Divided into two groups, we were presented with a timeline scale labeled cute on one side and creepy on the other. Our objective within our groups was to collectively agree on the position of each toy on the timeline. In my group, we first identified the ‘cutest’ and ‘creepiest’ toys to establish a standard in ranking. As we went along, we began to make the connection that some of the toys were so creepy they seemed cute, and so cute they seemed creepy. This led us to transforming our linear scale into a circular model. We felt this better represented the relationship between cute and creepy, and allowed us to make more nuanced observations about the toys. After each group presented their categorized toys, we had a group discussion about the physical characteristics that made the objects ‘creepy’ or ‘cute.’ Mixing different materials, like plastic and fabric, made something appear creepy. Completely black large eyes, often paired with small facial expressions, were seen as “soulless” and therefore creepy. Toys that depicted more anatomically correct eyes that protruded from the surface were also deemed creepy. In general, small black dots for eyes made something cute. Especially, if those eyes were paired with minimal facial expressions like a small smile. Size was also an important factor in determining cuteness, as smaller toys were seen as cuter than larger ones. While it was interesting to discuss what made the toys cute or creepy, I do not feel we talked enough about the toys we deemed ‘neutral.’ All the toys I personally brought were my husband’s when he was a young boy. A lot of these toys, including many small figures of superheroes were placed in the ‘neutral’ category. I found it interesting that a lot of the toys that were geared towards young boys, like the superheroes, were not associated with cuteness or creepiness. While stuffed animals or dolls, common toys associated with young girls, were markedly more classified into either the ‘cute’ or ‘creepy’ category. I was surprised to see such a difference in the categorization of toys based on inherent gender biases.
Overall, I found this activity to be a very impactful way to start the internal dialogue of the ideas and themes of cute and creepy in artwork. I could see this activity being an introduction to many different K-12 art assignments that challenge students to analyze societal conventions. By having students make quick and categorizing decisions, especially collectively as a group, you can then prompt them to reflect on the decisions they themselves made. For the sake of time, this activity may need to be altered to specify the student only bring in one toy. Further, I noticed in our own classroom discussion, there were some students who felt offended by the placement of their toys on the ‘creepy’ side of the spectrum. I think this can be solved in a K-12 setting by instructing students to bring a toy that is not precious to them, and have the toys randomized into different groups before categorization begins to prevent biases.
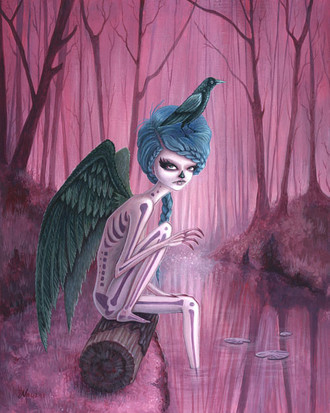
In my own lesson of K-12 Cute and Creepy, I would most likely use examples of artwork from Megan Majewski. Megan is a Canadian artist who explores ‘big ideas’ by exploiting the duality of cute and creepy in her art. Also, a lot of her work is inspired by and references pop culture. I think including this in the references I show may spark more interest and curiosity in the children, as I have seen firsthand how imbued even young children are in pop culture.
The final part of this assignment was to sculpt an object or animal out of air-dry clay that represents ourselves individually. Would we be cute or creepy? We were challenged with keeping these ideas at the forefront of our ideation process. After sketching some different ideas, I finally landed on creating a frog. I grew up in Florida and would see green tree frogs around very often. I was always fascinated by them because of their bright green and ‘cute’ appearance. However, I never attempted to capture them due to being creeped out physically by their slimy skin and strange mode of transportation: hopping. When I first tried sculpting my frog from clay, I was aiming for anatomical correctness. However, as I have very little experience with clay, my ambitions did not match my abilities in that moment. I came up with the idea of focusing on the features that I believed created the essence of a frog. So, I exaggerated the size of the eyes and put less detail into the body and limbs. I think this resulted in a rather ‘cute’ clay model of a frog. I would encourage this same thought process with my students who are struggling with working with clay. I would give them encouragement to create visual representations of the object or animal they are trying to portray, not necessarily perfect recreations on their first attempt.
I waited for about two weeks before I started painting my frog to ensure that it was completely dry. I used acrylic paint and a gloss medium achieve the look and feel I had envisioned. I used the Liquitex gloss pouring medium to make the paint more transparent and give the frog a shiny appearance. Access to a variety of brush sizes and types would give children the freedom to explore with creating texture in paint on their 3D sculpture. Further, background knowledge in basic color mixing would be beneficial for students to achieve more colors than what is provided 'from the tube.' To prevent messes while sculpting and painting, I used parchment paper underneath my frog. While the parchment paper was effective, in the future I would recommend to my students to secure the paper down to the table using masking tape.

During this process, I set up my camera on a tripod to film my painting process. Unfortunately, it was only after that I realized my camera has a 30-minute recording time limit before it automatically stops. Regardless, I was pleased with the final result after I sped up the footage and created the time-lapse below in Adobe Premier. I think this skill I am only beginning to develop, filming and editing videos of my artmaking process, could be useful in my future as an educator in an increasingly digital and visual world. Filmed demos can be used for students who are absent or need or want a refresher.
Overall, I am really happy with my finished project. I enjoyed using the clay to sculpt a 3-Dimensional object and then using paint to give the object color and more character. In my opinion, the frog I created has both cute and creepy attributes. I would categorize him in the “it’s so cute, it’s creepy” category my group imagined in the initial activity for this project.


Comments