3D Printing
- Makalla Shernick

- Apr 8, 2022
- 5 min read
Our 3D printing project began in George Mason’s MIX Studio in Horizon Hall building on campus. Over the span of two class periods, we learned the basics of how to make our own 3D printed objects in the MIX Studio. On our first day, we learned how to use the 3D printing software Ultimaker Cura. We used ‘readymade’ 3D object STL files and simulated how we would print these in the MIX studio. These files were made freely available on websites like thingiverse.com and thangs.com. We learned how to select the correct printer and what settings would produce various types of 3D prints. I used a 3D model of a Pokemon character to practice working with this printing software.
On our second day in the MIX Studio, we learned how to use the 3D design software Tinkercad. Tinkercad allows anyone with a web browser to create designs in a 3D space. This could have far reaching potential in an arts classroom, as many students have school issued laptops that they could utilize to access this design software. In my own classroom, I would use this software to enhance my student’s learning and understanding of 3D art and design. I think it is important to introduce the idea of 3D printing to students with an explanation of its endless usage cases. I believe this would allow students of any age to make more meaningful connections with what they create in programs like Tinkercad. As with our class, I think at least two class periods with students would need to be spent learning how to use Tinkercad before their final project assignment is introduced. During our presentation on using Tinkercad, I spent some time creating a few different designs of my own in the program. I would use the first two class periods in a lesson on 3D Printing and Tinkercad to allow for the same type of exploration that I was able to accomplish below.
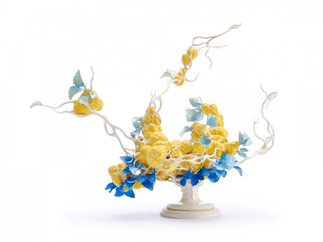
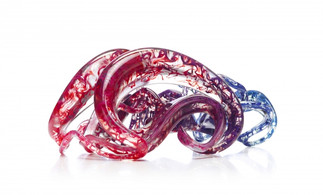
To introduce contemporary 3D printing in my classroom, I would reference Belgian artist Nick Ervinck. In exploring the relationship between the digital and the physical, Ervinck pushes the boundaries of the spatial existence of objects. Ervinck applies tools and techniques from new media to explore the aesthetic potential of sculpture, 3D prints installation, architecture and design. His sculptures range in size from miniature to giant public works of art.
After refamiliarizing myself with Tinkercad, as I had used this software a couple of times before, I embarked on creating my own design for 3D printing. I started in my sketchbook and drew out a few different ideas of things I could create. Since the introduction to this project was more focused on learning how to 3D print rather than introducing new concepts, I decided to extend the original ‘Cute and Creepy’ assignment. In that project, I made a frog out of air-dry clay. For my 3D print design, I wanted to make a lotus flower with the center wide enough to fit a tea candle. The addition of a Lilly pad was not in my original sketches but was something I thought to add whilst in the design software. This 3D design is an extension of the ‘Cute and Creepy’ assignment not only by the theme of aquatic life, but further connects to me personally by expanding on the idea of representation of self through objects. I value tranquility and light in my life, and I think this is well represented in the setting I have created for my frog.

Creating a lotus flower, with its uniquely shaped petals was more difficult to create in Tinkercad than I had initially expected. I used a lot of experimentation and trial and error tactics to achieve the general look of the lotus flower. Besides just getting it to look aesthetically pleasing, I had to keep in mind all of the things that I learned about the practicalities of 3D printing in our class’ workshop. There were times when I thought of changing my idea because it was frustrating to get things to look the way I wanted them to. However, I pushed myself to keep working with the idea in Tinkercad and see what I could come up with. I am glad I made this effort because in the end, I was pleased with my final design. Teaching 3D design in Tinkercad will require a lot of encouragement to persist on my part as the teacher. This software can be very fickle and requires some ‘outside of the box’ thinking to achieve different textures and forms. This would be an excellent way to encourage students to experiment and explore many different possibilities of approaches. In assignments for my students, I would encourage them to create objects in Tinkercad that they feel excited to make. I would not have very specific prompts on what to make exactly but would allow students to think of inventive ways to use the software.
I went to the MIX studio on campus to get the 3D model in Tinkercad printed with their 3D printers. This was the easiest stage of the entire experience, as the students working at the MIX were incredibly helpful in guiding me throughout the entire process. Due to the size of my 3D print, I ended up using the Ender-3 Pro printer. I chose the 1.75mm PLA white filament and set the heat setting on the printer to 220 degrees Celsius based on the appropriate heat range indicated on the filament roll’s label. My model began printing at 1:30pm and was ready the following day around 4:00pm. When I came to pick up my print the following evening, it was conveniently set at the front of the studio for me to retrieve. I was surprised with how long it takes to get a 3D model printed. This made me think about the practicality of having my students get their computer-generated 3D models printed into the real world. Based on varying factors—like class size, access to 3D printers, and object size—the process of printing could take weeks or months to complete. Considerations for this would need to be made prior to embarking on a unit that ends with a student’s creating a 3D printed object.
After taking my print home, I knew I needed to paint my project to feel like as though it was complete. It took me around 3 to 4 coats of paint before I was satisfied with its appearance. In the future, I think I would probably lightly sand the print to get rid of the “bumpy” texture left behind from the printing pattern. I believe in the end, painting my 3D model is what really brought it to life.


Comments